General Ceramic Information
Custom technical ceramic parts are produced in the methods explained below. All features of the part are formed to a pre-determined size, a precise percentage larger than the part specification to compensate for the removal of the organic binders during the sintering process. The removal of the binders during this process will cause the part to shrink to the desired size per the print specification
Pressed Ceramic Parts
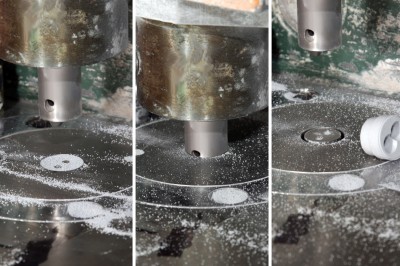 In the design of pressed ceramic, shapes with dimensions in the pressing direction are the easiest to produce, due to the ejection of the part from the press. The forming process occurs by compacting ceramic powder in a given die cavity. The actions are all from the top and bottom with no side action available. The material is fed into the cavity by gravity, and the die operates (as in the illustration).
Wall Sections: Wall sections are very important in the design of the pressed ceramic insulators. The ceramic material as well as the forming process must be carefully controlled to produce extremes of wall section thickness. In the design of the ceramic insulator an absolute maximum length to wall section ratio is 8:1 ratio. As this ratio is reached, the press rate is decreased and the cost is increased due to slower pressing rates. The walls should be at least 5% of the length with a minimum of .030. Ceramic materials compositions are cold formed and do not flow like molded plastic materials.
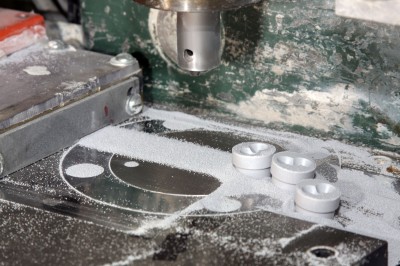 Holes: Holes of a diameter of less than .020 create increased die maintenance because there is a greater chance of pin breakage, especially in thick parts over .250″. Distances between holes or between the holes and the OD of the part should be at least the diameter of the hole. Thinner sections may cause cracking during the firing procedure. Holes in a horizontal plane cannot be acheived in the pressing procedure but could possibly be accomplished in a secondary machining operation. Holes that are counterbores or blind holes should not be more than 50% of the overall length. If this were required, again the requirement would be a secondary machining operation.
Flatness: This is a direct result of the design and the amount of levels and wall sections for each individual part. The more consistent the part in thickness, the closer the flatness can be held. The normal tolerance for flatness or camber is .006/inch. In some designs a grinding operation is available to achieve a closer flatness specification of +/-.0005 can be permitted.
Tolerances: Normal tolerances are +/- 1% none less than +/- .005. The simpler the design the closer the tolerances can be held. Thin walls and various levels are more difficult to maintain and so create additional scrap and add to costs. Again in some designs grinding of the OD or length can be added to the fired dimensions to hold tolerances associated to grinding operations. The best practice is to clearly identify which features are critical to the function of the product and apply the tolerances needed. The balance of the dimensions should be tolerated as liberally as possible to prevent unnecessary additional costs.
Parallelism: Parallelism is to be considered satisfactory when the thickness falls within the tolerance on the thickness. This could mean, one end of the part could measure minimum tolerance and the other end the maximum tolerance.
Fillets: All inside corners should include a fillet to add to the strength of the part and reduce the chance of a crack or chip occuring in a sharp corner. This also aids in the release of the part from the die.
Extruded Ceramic Parts
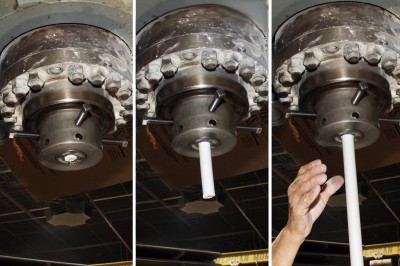 In the ceramic extrusion process, material flows through a die, and the design and holes run in the direction of the extrusion. (See Illustration A). It is important to try and maintain a balance and wall section to allow the extrusion to properly flow from the die. (See Illustration B). It is also important to avoid sharp points as this prompts cracking in the final part.
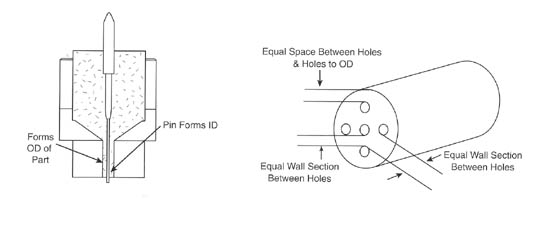
Wall Sections: The wall sections and the distance between shapes and holes should be maintained at no less than 10% of the OD.
 Tolerances: Normal tolerances are +/- 1%, none less than +/- .005. Camber tolerance on a part is .006/inch of length. Grinding of the OD and length can be added to permit tolerances for accurate assembly.
Camber: The standard allowance for camber is .006 per inch of length. The method for determining camber is to roll the entire length of the part between two parallel plates with a separation equal to the OD plus the camber allowance of .006 times the length. (IE: A tube that measures .252 OD and is 2.5″ long is .252 + .015 = .267). The plates would be set at a .267 spacing.
Glazed Ceramic Parts
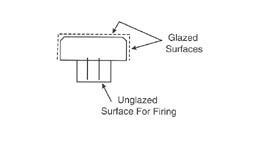 Glaze Application: Glaze is normally applied to a part by a spray process. Typically one end and/or the OD of the part is coated. It is necessary to fire the part after glazing, so we require one surface to be unglazed so that it can be placed on the surface for firing. (See illustration).
Tolerances: Glazed parts typically have a tolerance of +/- 1 1/2% none less than +/- .007.
